BeFunky's Graphic Designer makes it easy to create custom designs for social media, business marketing, invitations, announcements, and more. Choose from professionally designed templates, start with a blank canvas, use an existing image, or create something unique with Image Generator.
Customize your designs with text, graphics, images, and other creative tools to bring your ideas to life.
Watch the video below for an overview of the Graphic Designer, then explore the workspace and learn how to start your next design project.
Workspace Basics and Page Elements
Getting familiar with the Graphic Designer workspace is the first step toward creating your own designs. When you open the Graphic Designer, you can choose a design template, start with a blank canvas, or select another option for starting a project.
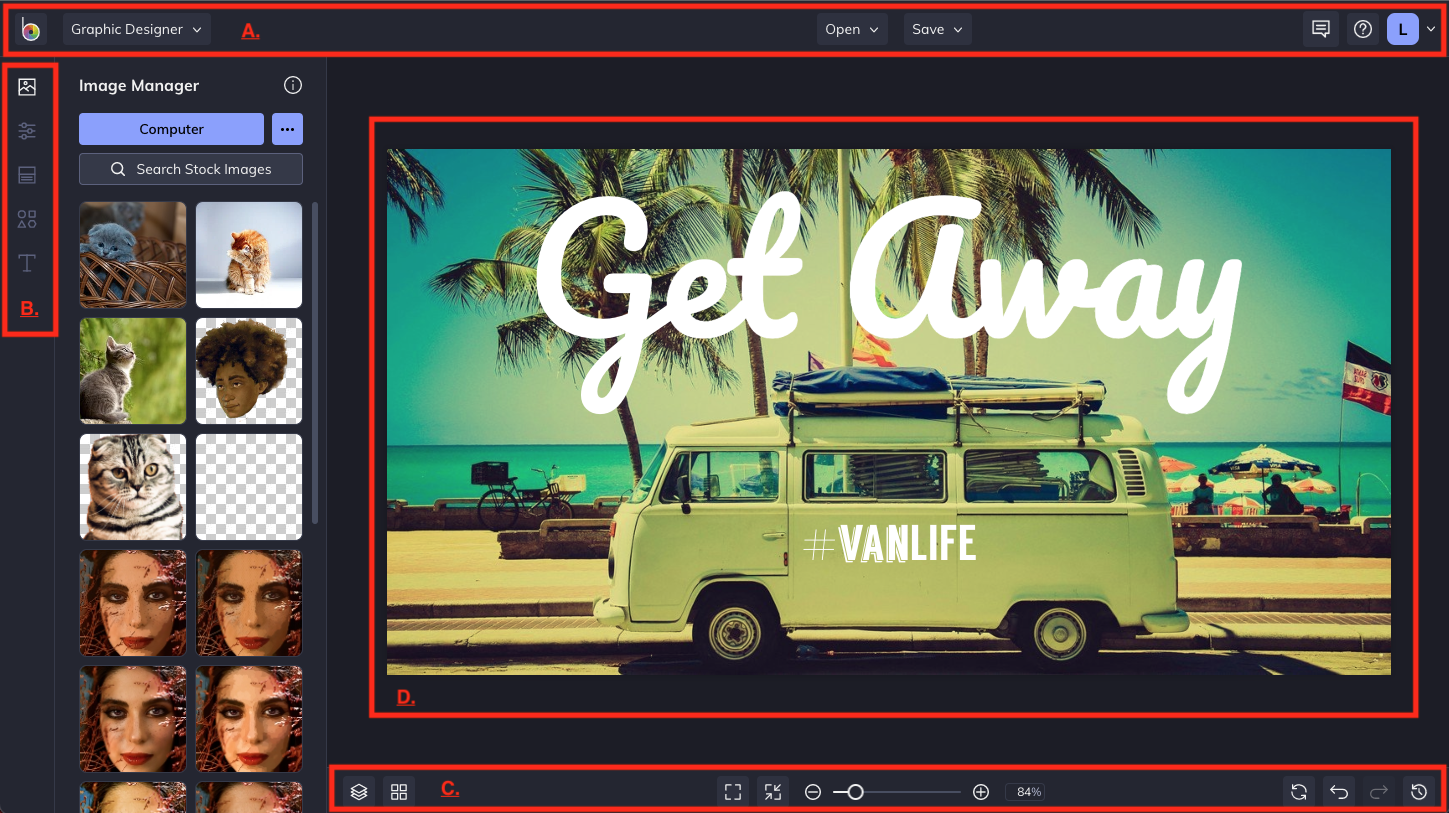
A. Main Navigation Bar
The Main Navigation Bar runs across the top of your workspace. From here, you can switch between BeFunky's applications, open images and projects, and save your designs.
Select Open to view your options for starting a new design, including using an existing image or creating one with Image Generator.
On the right, the Profile dropdown lets you manage your account information, update your settings, contact Support, and more.
B. Left-Hand Menu
The Left-Hand Menu contains the tools you can use to create and customize your designs, including templates, text, graphics, and the Image Manager.
Hover over an icon to expand the menu and explore the available tools.
C. Bottom Bar
The Bottom Bar contains tools for managing Layers and Groups, aligning design elements, zooming, and moving around your canvas.
You can also undo and redo changes, review your edit history, or reset your canvas.
D. Canvas
The Canvas displays the design you're currently working on. This is where you can arrange, edit, and customize the elements in your project.
Starting a Project
There are several ways to start a project in BeFunky's Graphic Designer. You can choose a professionally designed template, start with a blank canvas, open an existing image, or create a custom image using Image Generator.
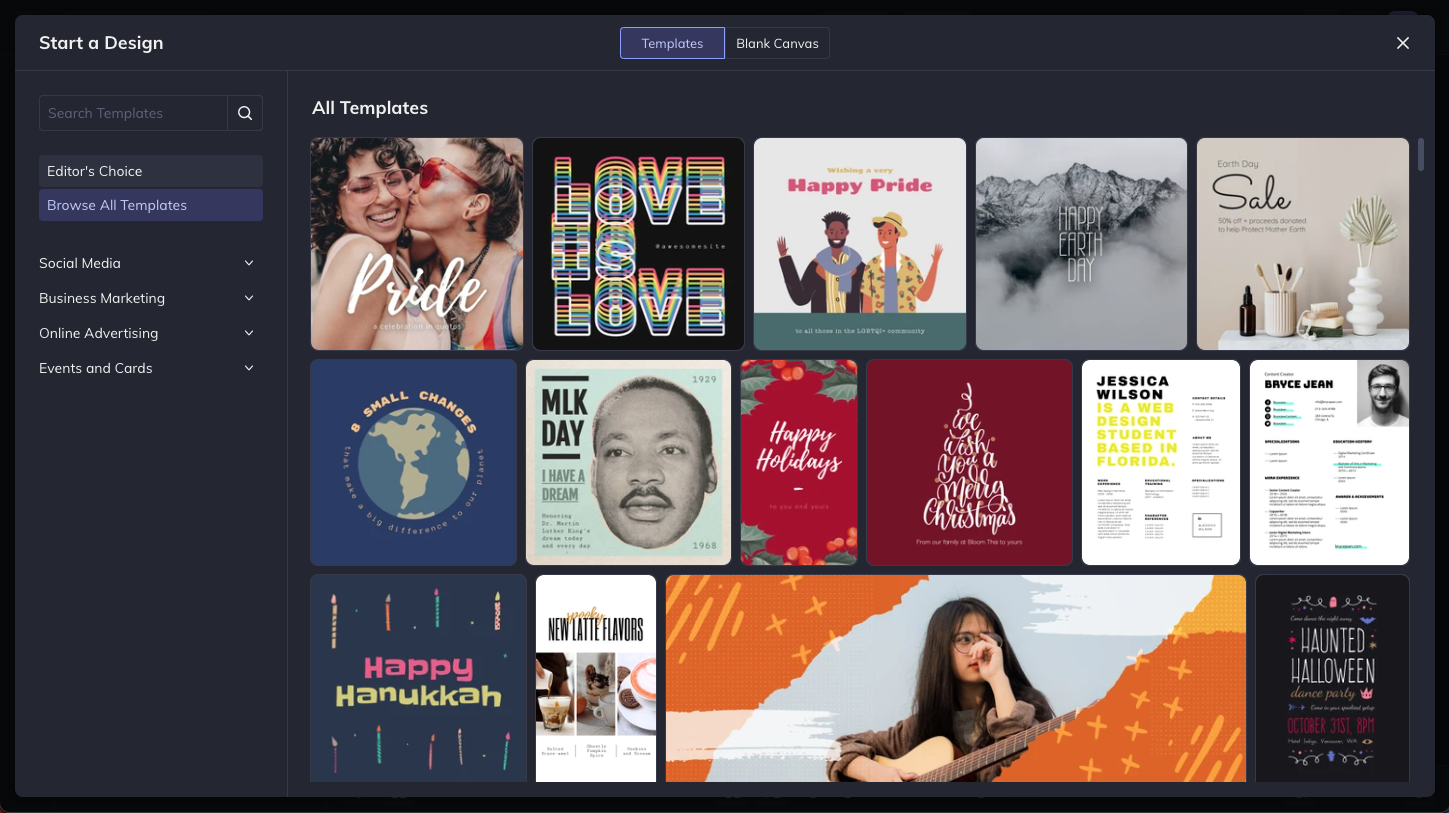
Select Open from the Main Navigation Bar and choose one of the following options:
- Start With a Template: Browse BeFunky's template library to find a professionally designed layout that you can customize for your project.
- Start With a Blank Canvas: Choose a blank canvas to create a design from scratch using preset or custom dimensions.
- Start With an Existing Image: From the Open menu, select Image under New Design to open a photo or image as the background of your new design. The canvas will automatically resize to match the image's dimensions.
- Start With Image Generator: Select Image Generator under New Design. Enter a prompt describing the image you want to create, choose an Aspect ratio, and select Generate.
Once you've generated an image you want to use, select Open in Designer to begin working with it in the Graphic Designer. You can then add text, graphics, and other design elements to customize your project.
Images created using Image Generator are automatically saved under Image Generations in your Image Library, allowing you to access and reuse your previous creations.
To reuse a previously generated image, open Image Generations, select your image, and choose Add to Image Manager. From the Image Manager, you can select the image and choose Start New Project.
For more information about creating and using AI-generated images, see How to Use BeFunky's Image Generator .
Pro Tip: You can also start a new design using an image already in your Image Manager. Select the image thumbnail, then choose Start New Project.
Zoom and Pan
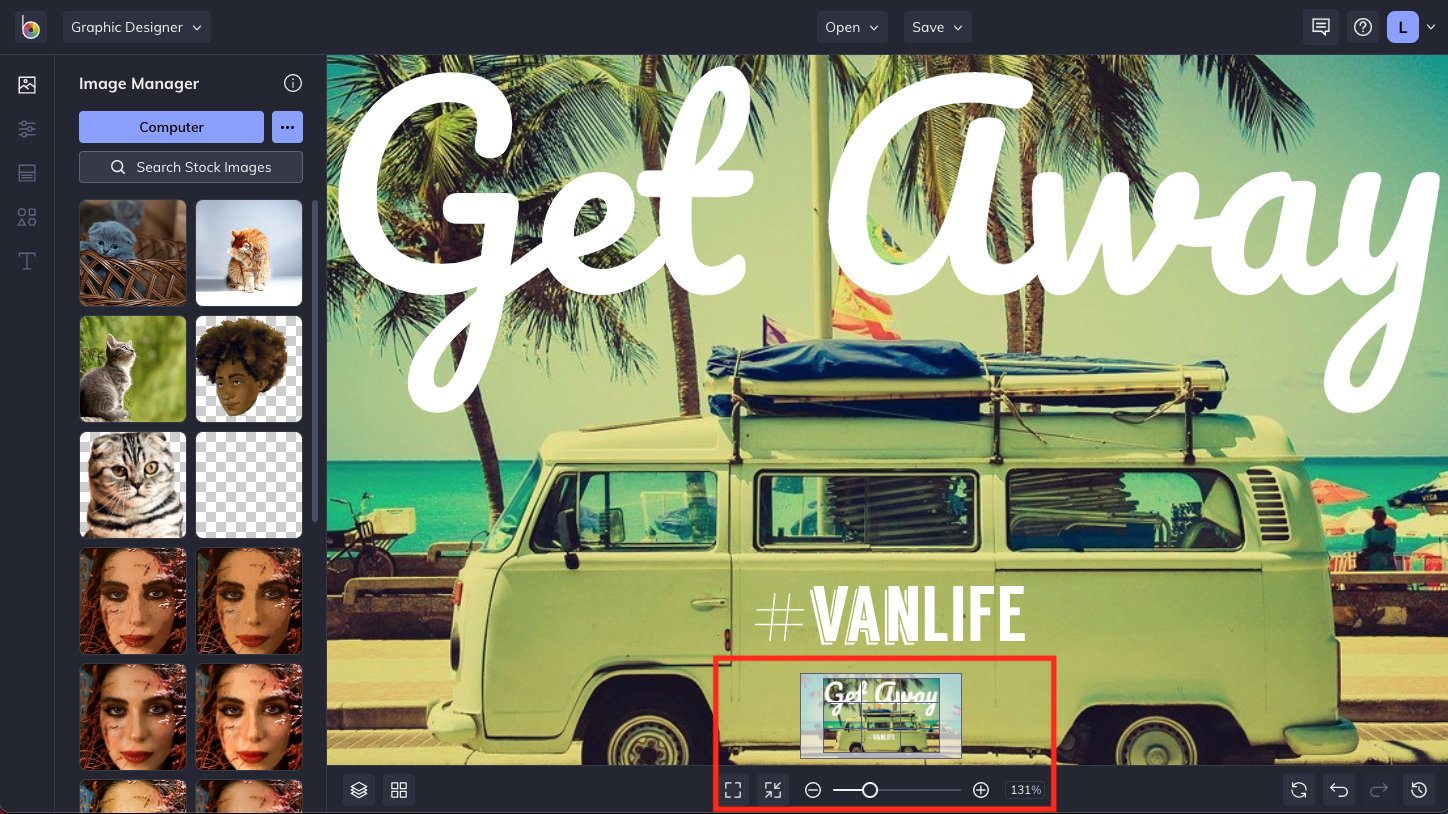
Use the slider in the Bottom Bar to zoom in or out of your design.
When you're zoomed in, you can move around the canvas, also known as panning, by holding the Spacebar while clicking and dragging your design.
This is especially helpful when working on detailed areas of your design without repeatedly zooming in and out.
Pro Tip: If you're using a touchpad, you can also use two fingers to pinch to zoom in or out, or swipe to pan around the canvas.
Undo and History
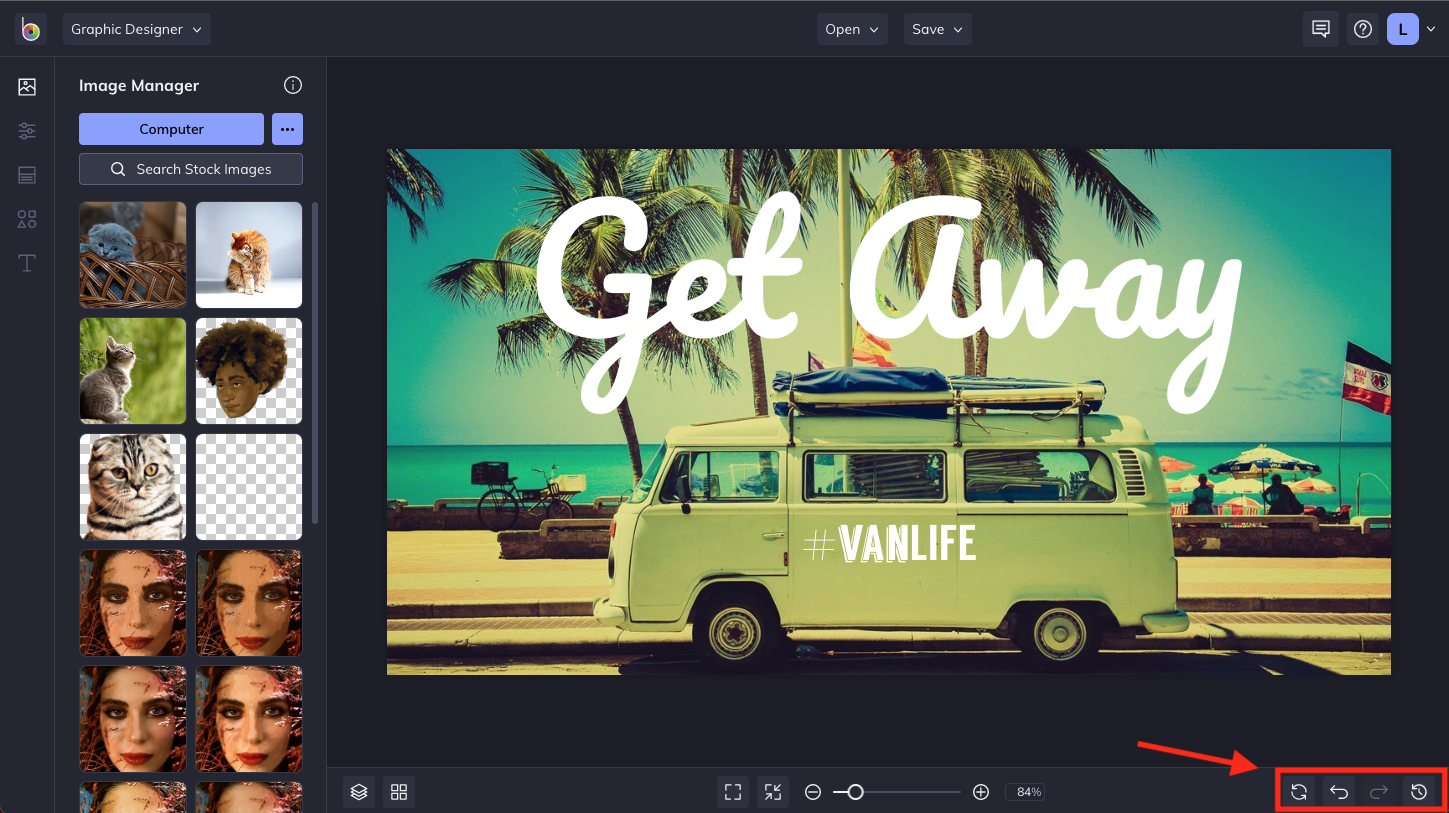
The Bottom Bar includes tools to help you manage changes as you work on your design.
- Reset: Clears your current project from the canvas so you can start over.
- Undo: Reverses your most recent action.
- Redo: Restores an action you've undone.
- History: Displays the edits you've made during your current session, allowing you to return to an earlier stage of your design.
Saving and Sharing
When you're finished designing, select Save from the Main Navigation Bar to choose where you'd like to save your project.
You can save your finished designs in formats such as JPG, PNG, or PDF, depending on your intended use.
If you'd like to continue editing your design later, you can also save it as a BeFunky Project (.BFD) , which preserves your layers and design elements.
For more information about saving your designs to your account, see Saving to BeFunky .